Projects
Projects are the accounts on your organization’s project axis. A claim, invoice, journal line or other document can be charged to a project, so you can see what each one costs. This page lists the projects and, below them, who approves what is charged to each one.
People with access to the accounting books see the project list; people allowed to manage the chart of accounts can add and edit projects. People with access to approval workflows see the approvers section.
Open Projects in the sidebar.
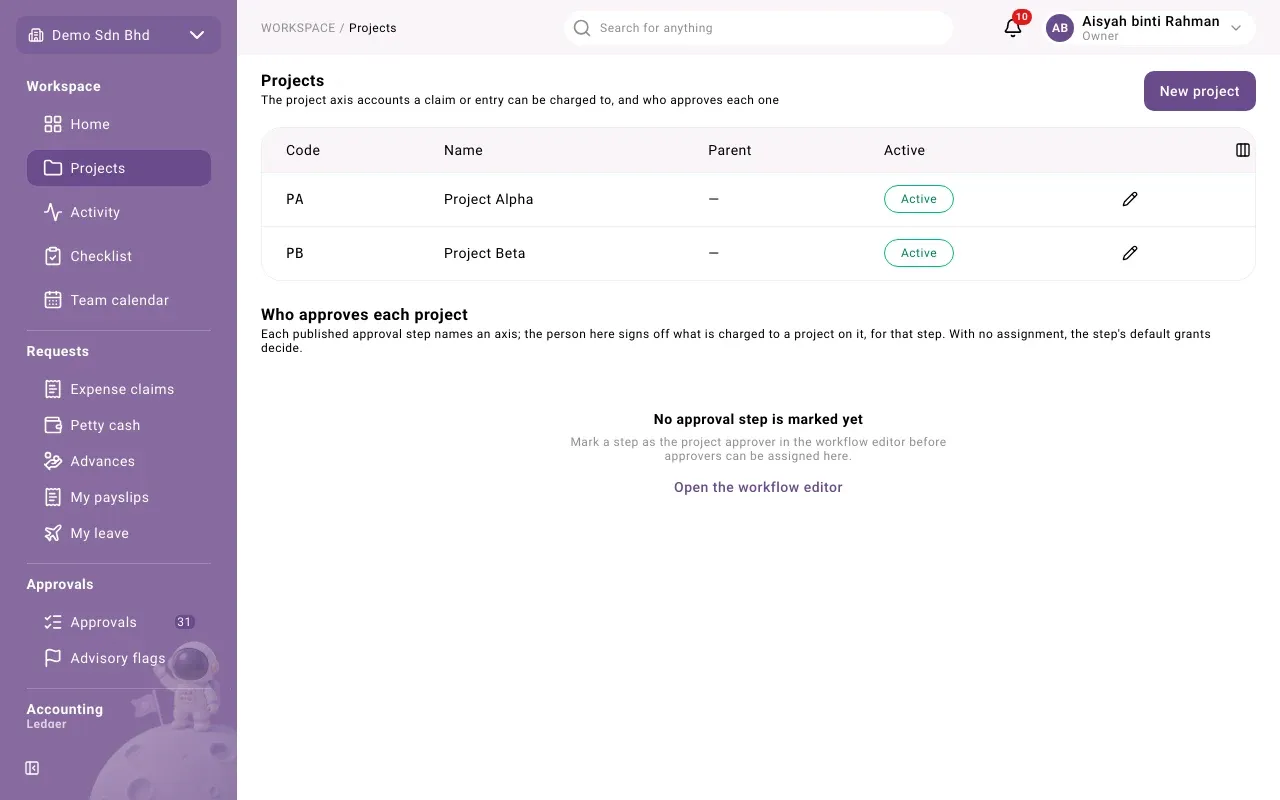
| Column | What it shows |
|---|---|
| Code | The project’s code |
| Name | The project’s name, with Members only if only invited people can use it |
| Parent | The project it sits under, if any |
| Active | Active or Retired |
If the page says No project axis yet, your organization has not set up a project axis; ask your administrator.
Add a project
Section titled “Add a project”- Select New project.
- Fill in the form and select Save. You will see “Project saved”.
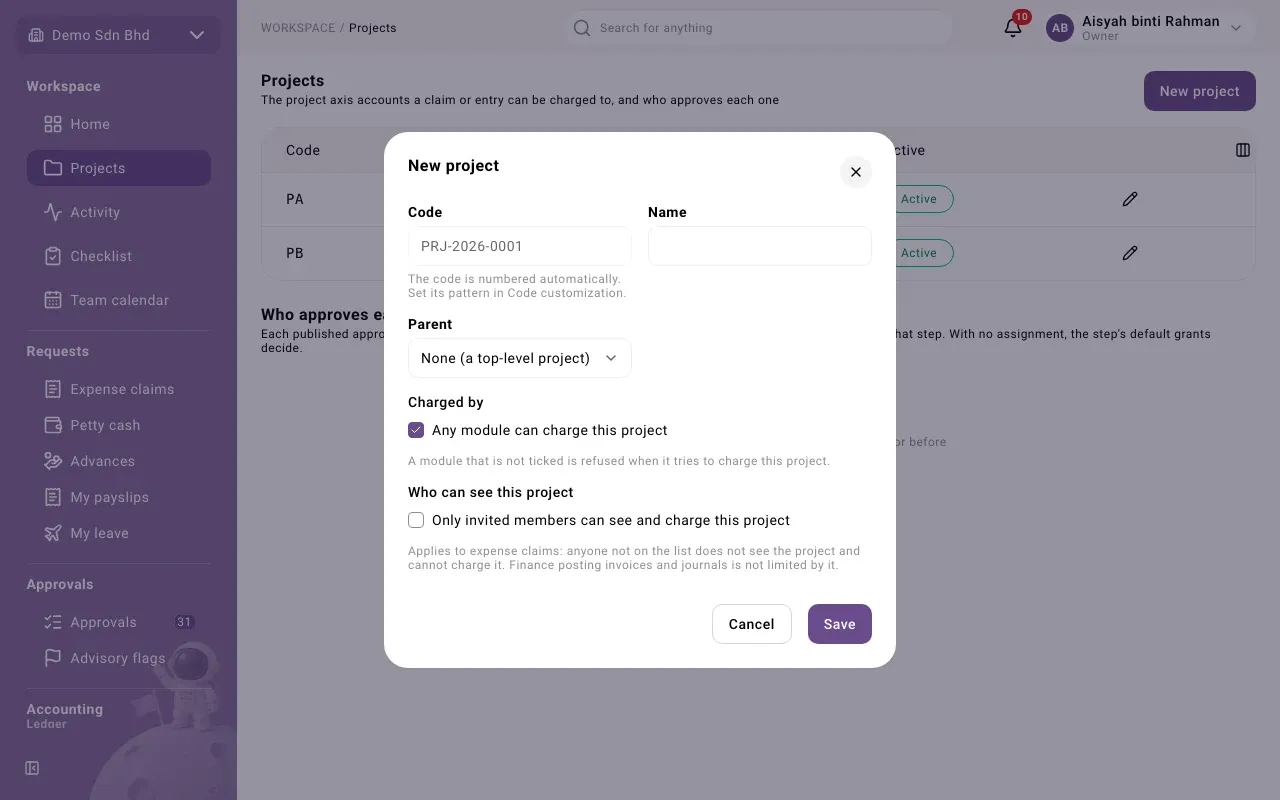
| Field | What to enter |
|---|---|
| Code | Filled in for you: “The code is numbered automatically.” Its pattern is set in Code customization. |
| Name | The project’s name |
| Parent | The project it belongs under, or None (a top-level project) |
| Charged by | Leave Any module can charge this project ticked, or untick it and tick only the modules that may: Expense claims, Purchase invoices, Sales invoices, Trade documents, Fixed assets, Manual journals, Petty cash spends, Advance acquittals. A module that is not ticked is refused when it tries to charge the project. |
| Who can see this project | Tick Only invited members can see and charge this project to limit it. |
If you untick Any module can charge this project, pick at least one module.
Members-only projects
Section titled “Members-only projects”A members-only project applies to expense claims: anyone not on the list does not see the project and cannot charge it. Finance posting invoices and journals is not limited by it.
Save the project first, then open it again to give people access:
- Invite a member adds one person. Use the remove button beside a name to take them off.
- Open to a department lets everyone in that department, and any beneath it, use the project without being invited.
Edit, retire or reactivate a project
Section titled “Edit, retire or reactivate a project”Select the pencil button on a project’s row. You can change the Name, Charged by and Who can see this project, then select Save. The code and parent cannot be changed.
Select Retire to stop a project from being used, or Reactivate to bring it back. Retired projects stay in the list, marked Retired.
Who approves each project
Section titled “Who approves each project”Below the list, Who approves each project shows, for each project, the person who signs off what is charged to it at each approval step marked for projects. With no assignment, the step’s default approvers decide. An administrator sets these up; a claimant never picks their own approver.
If it says No approval step is marked yet, a step must first be marked as the project approver in the workflow editor.