Expense claims
An expense claim is how you get money back for something you paid for on the company’s behalf.
File a claim
Section titled “File a claim”- Open Expense claims and select New claim.
- The wizard has three steps: Claim details, Amount & receipts and Confirm & submit.
Step 1 — Claim details
Section titled “Step 1 — Claim details”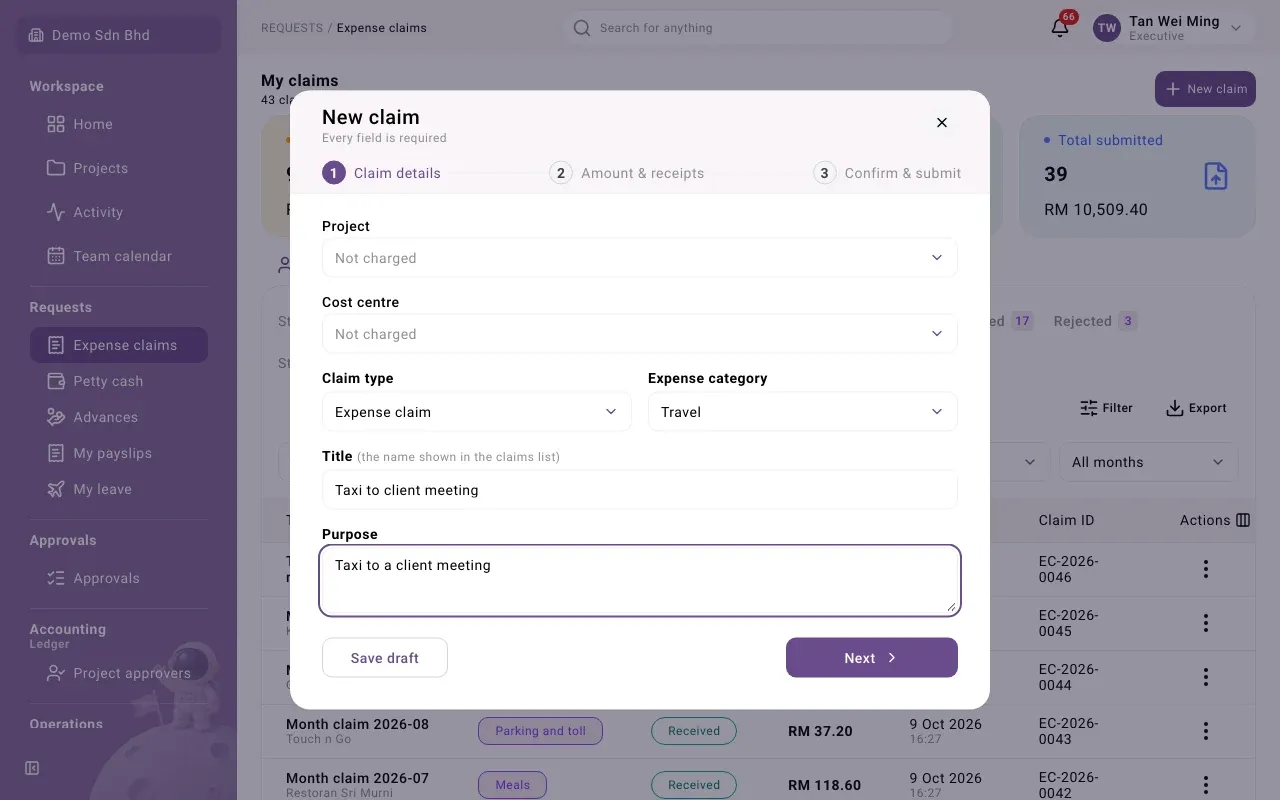
Every field is required.
| Field | What to enter |
|---|---|
| Project and Cost centre | Where this spend is charged. Leave Not charged if neither applies; your approval flow may require one. |
| Claim type | Normally Expense claim |
| Expense category | Choose a category |
| Title | The name shown in the claims list, e.g. “Client lunch” (up to 200 characters) |
| Purpose | Briefly say what the expense was for (up to 500 characters) |
Step 2 — Amount & receipts
Section titled “Step 2 — Amount & receipts”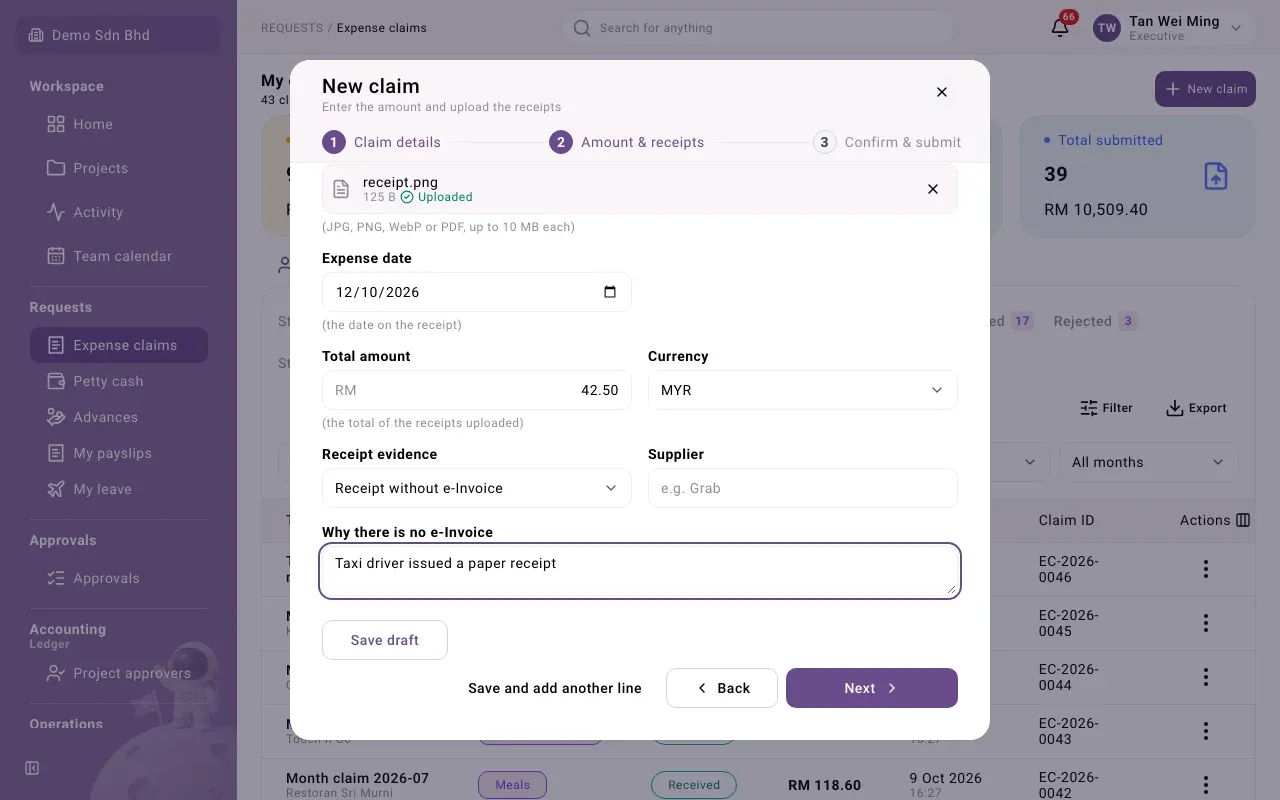
| Field | What to enter |
|---|---|
| Receipts | Upload JPG, PNG, WebP or PDF files, up to 10 MB each. At least one is required. |
| Expense date | The date on the receipt |
| Total amount | The total of the receipts you uploaded, greater than zero, e.g. 30.00 |
| Currency | A three-letter code, such as MYR |
| Receipt evidence | See below |
Receipt evidence tells the company what kind of document you have:
| Choice | Use when |
|---|---|
| e-Invoice to the company | The supplier issued an e-Invoice to the company |
| e-Invoice in my name | The supplier issued the e-Invoice in your name |
| Foreign supplier invoice | The supplier is outside Malaysia |
| Receipt without e-Invoice | You only have an ordinary receipt. You will be asked Why there is no e-Invoice; answer briefly, e.g. “Taxi driver issued a paper receipt”. |
If your approval flow needs a project, you will see “Choose a project: this claim’s approval needs it”. Use Split if the spend belongs to more than one, with a percentage for each part.
Step 3 — Confirm & submit
Section titled “Step 3 — Confirm & submit”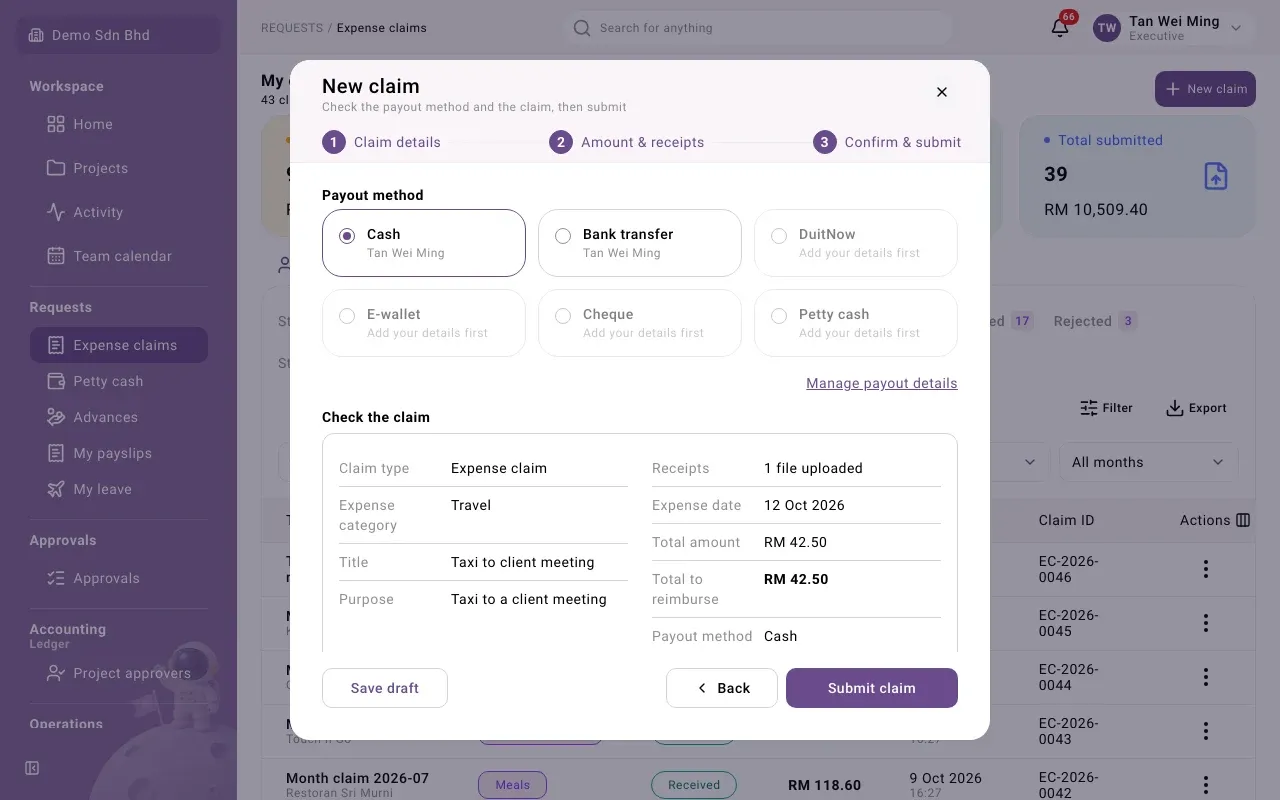
- Choose your Payout method: Cash, Bank transfer, DuitNow, E-wallet, Cheque or Petty cash. A method that says Add your details first or Details need updating needs your details first: select Manage payout details.
- Check the summary under Check the claim, including Total to reimburse.
- Select Submit claim. You will see “Claim EC-… submitted” with your claim ID.
More than one receipt or expense
Section titled “More than one receipt or expense”Select Save and add another line to put several expenses on one claim. They are listed under Other lines on this claim. Use Withdraw line to remove one.
Not ready yet?
Section titled “Not ready yet?”Select Save draft. Only you can edit your own drafts: find the claim in My claims, then use Actions → Edit draft.
Follow your claim
Section titled “Follow your claim”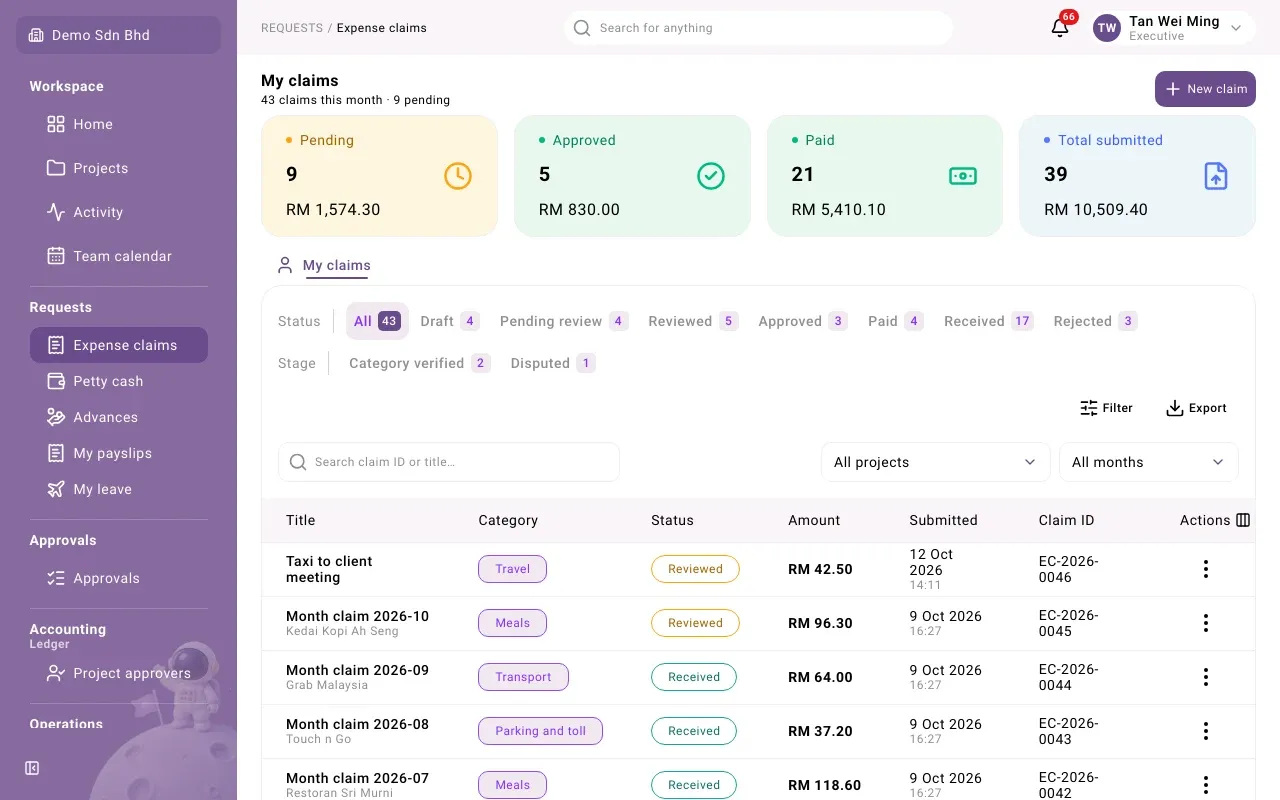
My claims lists your claims with a summary of Pending, Approved, Paid and Rejected totals. Open a claim (it opens in a side panel) to see:
- its Status and Approval progress, with who did each step and when
- your Receipts, which you can Download
- Payouts once it has been paid
- Comments, where you can ask or answer questions
- a PDF button to save a copy of the claim
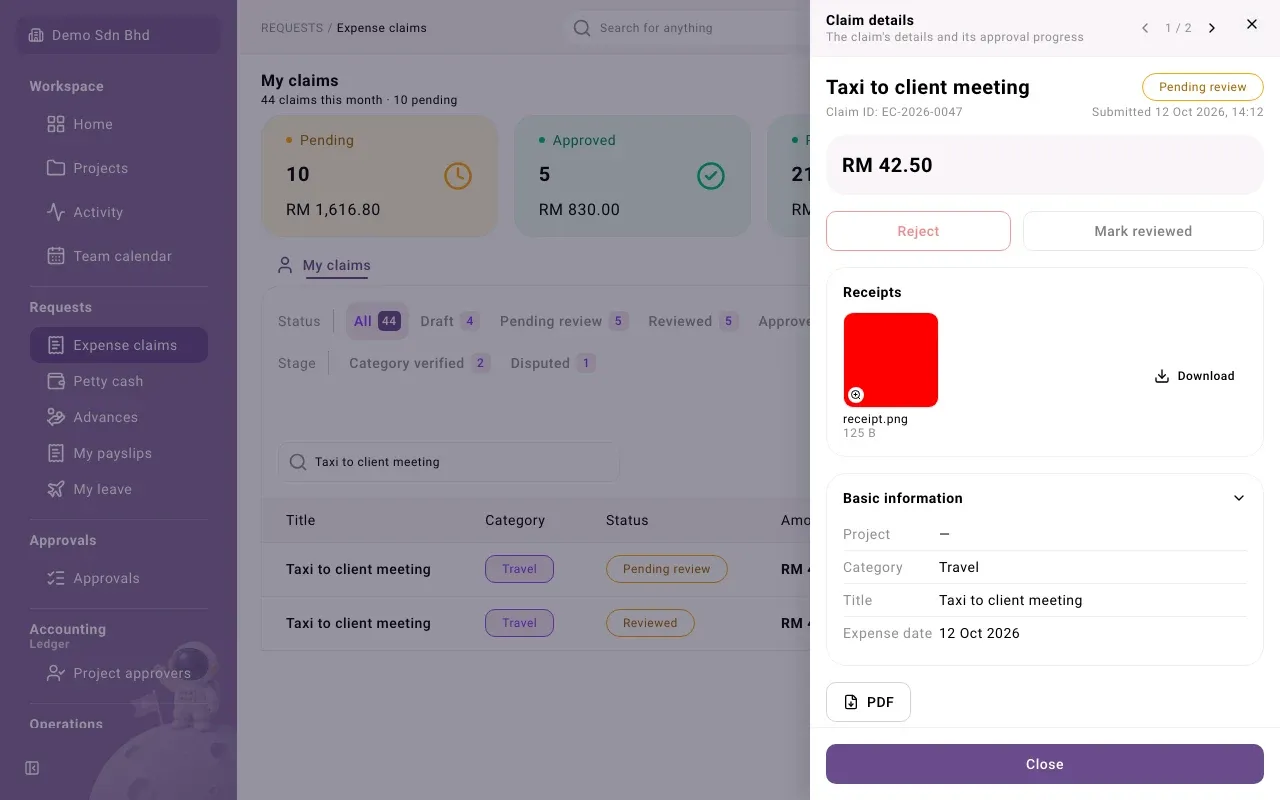
To find a claim, search by Claim ID or title, or use Status, Project, Month and Filter. Export downloads the list you are looking at.
See Claim statuses for what each status means and what you do next.
When a claim is rejected
Section titled “When a claim is rejected”Open a rejected claim to see why it was rejected. Select Revise to turn it back into a draft, fix what was wrong, and Resubmit.
When it is paid
Section titled “When it is paid”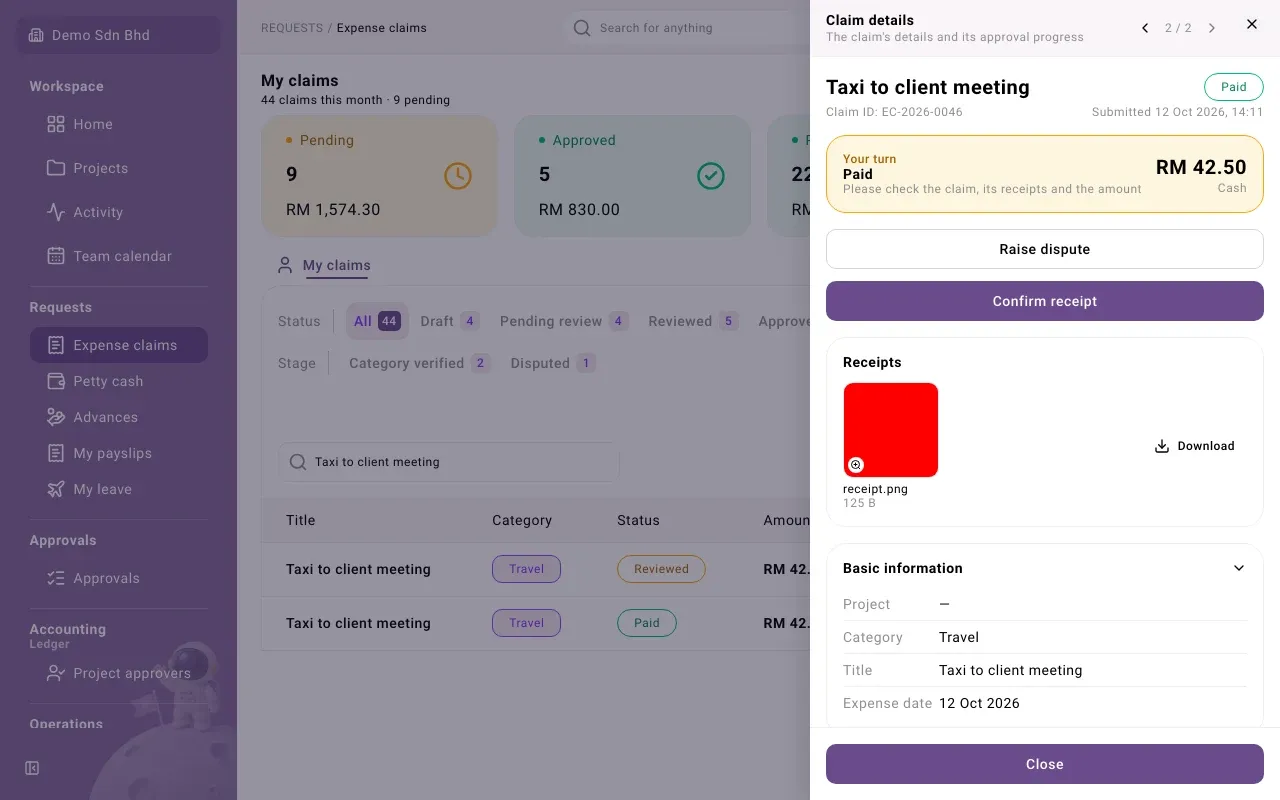
Once the status is Paid, check that the money arrived, then select Confirm receipt. If something is wrong, select Raise dispute and give your reason.