Document layouts
Document layouts sets what your printed documents show, in which language and with your logo: invoices, statements, payment advices, claim vouchers, purchase orders and quotations. It also sets which columns the expense claims Export downloads. Open it under Manage. It is for administrators your organization has given access to document layouts.
Your logo
Section titled “Your logo”The Logo card at the top holds one logo for every document.
- Under PNG or JPEG, up to 256 KB, choose the file. It is saved straight away, and you see “Logo saved”.
- To take it off, select Remove logo.
Whether each document prints the logo is set in its own layout, with Print the logo.
Printed documents
Section titled “Printed documents”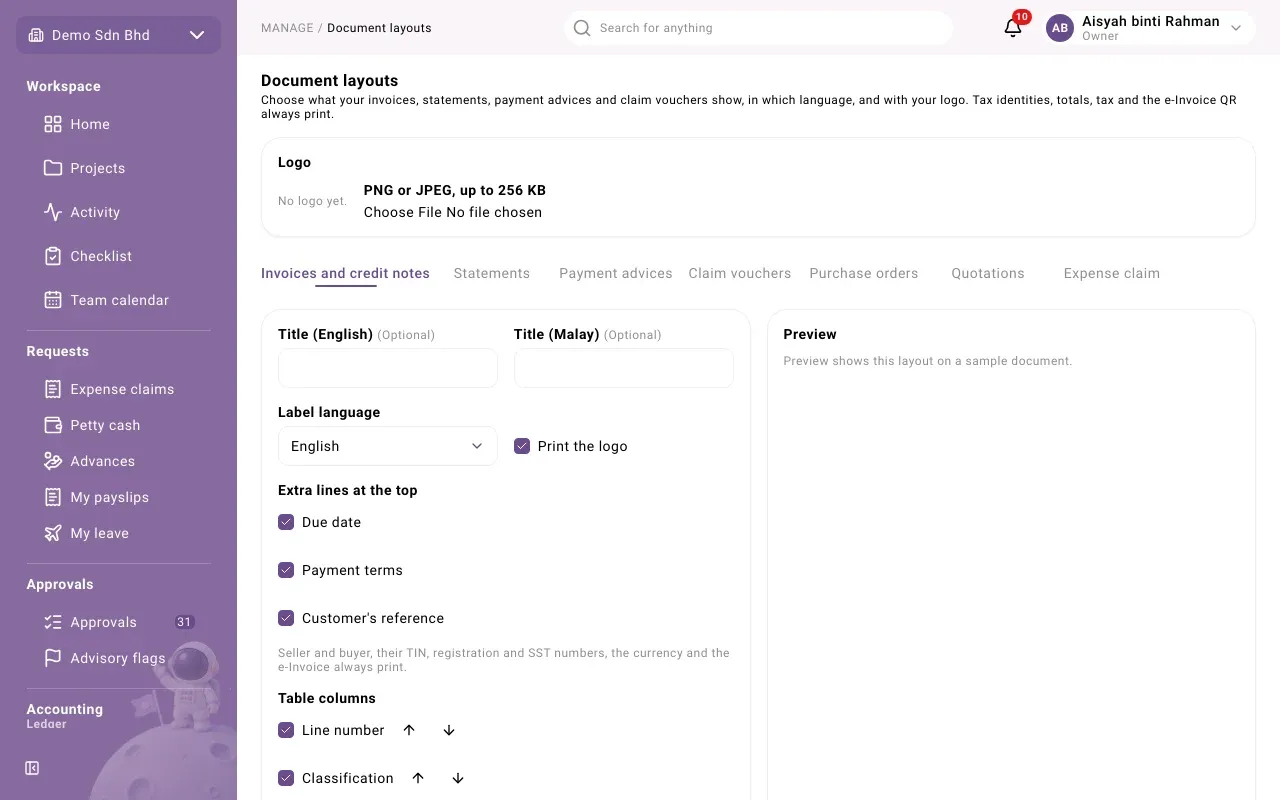
Choose a tab: Invoices and credit notes, Statements, Payment advices, Claim vouchers, Purchase orders or Quotations. Each has its own layout.
| Field | What to enter |
|---|---|
| Title (English), Title (Malay) | Optional. The document’s heading. |
| Label language | English, Malay, or English and Malay |
| Print the logo | Tick to print your logo |
| Extra lines at the top | Optional details for the top of the document. What is offered depends on the document, for example Due date, Payment terms and Customer’s reference on invoices, or Claim title and Claimant’s position on claim vouchers. |
| Table columns | Tick the columns to print. Use Move up and Move down to change their order. |
| Footer notes | Optional. Printed after the table, for example bank details. English or Malay, up to 10 lines. |
Under the extra lines, each layout reminds you what always prints: the seller and buyer, their TIN, registration and SST numbers, the currency and the e-Invoice. On Invoices and credit notes, your custom fields for sales invoices are offered as extra lines too.
- Make your changes, then select Preview to see the layout on a sample document.
- Select Save. You will see “Layout saved”.
The new layout is used the next time anyone prints that kind of document, for example with the PDF button on a claim.
Expense claim export
Section titled “Expense claim export”The Expense claim tab sets what the Export button on Expense claims downloads: one row per claim line, with the columns you choose, in your order, under your headings.
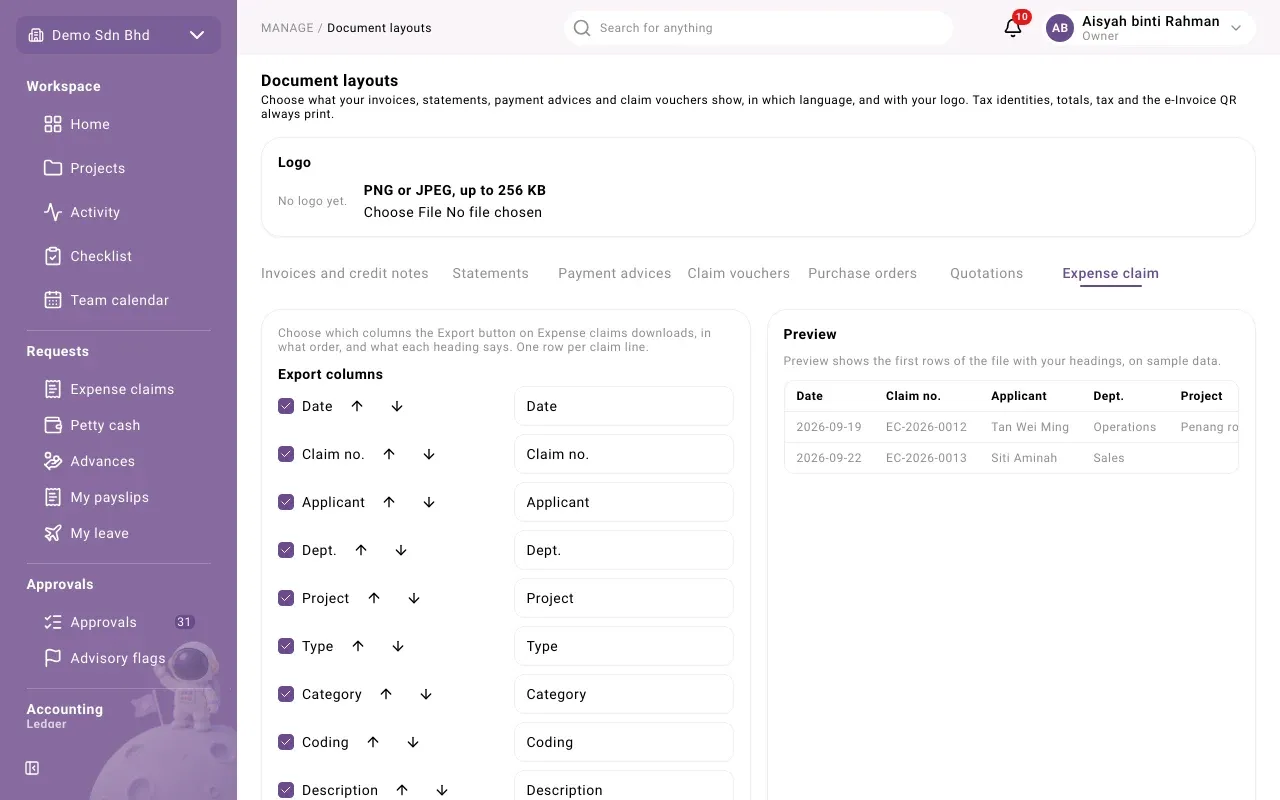
- Tick each column you want. Untick the ones you do not.
- Use Move up and Move down to put them in order.
- Next to each ticked column, type the heading the file should show.
- Check the Preview: the first rows of the file with your headings, on sample data.
- Select Save. You will see “Export layout saved”.
Reset to defaults puts back the standard columns and headings on screen; select Save to keep them.
| You see | What to do |
|---|---|
| “Turn at least one column on.” | Tick at least one column. |
| “Every column that is on needs a heading.” | Fill in the empty heading. |