Organization structure
The org structure records how your organization is arranged: its units (departments, branches), the positions in them, who holds each position, and which position reports to which. “Approvals are routed through this”: when someone files a claim, the app finds their superior from this structure, so keep it up to date.
You can read it if your administrator has given you access to the org structure; changing it needs the right to edit it. Open Org structure under Manage in the sidebar, or the Org structure tab on Team.
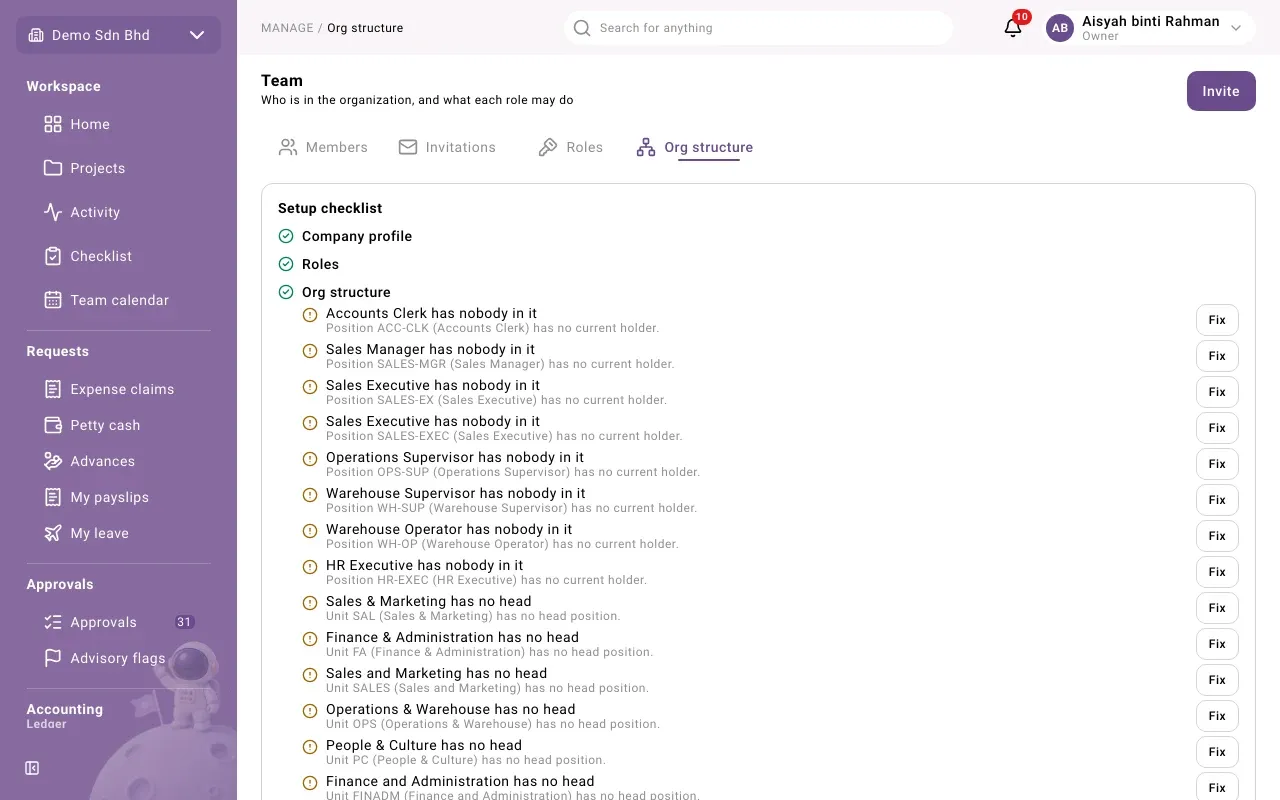
Setup checklist
Section titled “Setup checklist”Administrators see a Setup checklist at the top. It shows each part of the organization’s setup (Company profile, Roles, Org structure, Chart of accounts, Journals, Tax codes, Fiscal year and others) as done or not done. When everything is in order it just says Setup complete.
Under a step you may see warnings about the structure:
| Warning | What it means | What Fix opens |
|---|---|---|
| “… has no primary position” | An active member does not hold a primary position, so their claims have no superior to go to | Assign a position for that member |
| “… has nobody in it” | A position is vacant | Assign a holder for that position |
| “… has no head” | A unit has no head position | Edit unit |
| “… reports to a retired position” | A position’s line goes to a position that no longer exists | Edit position |
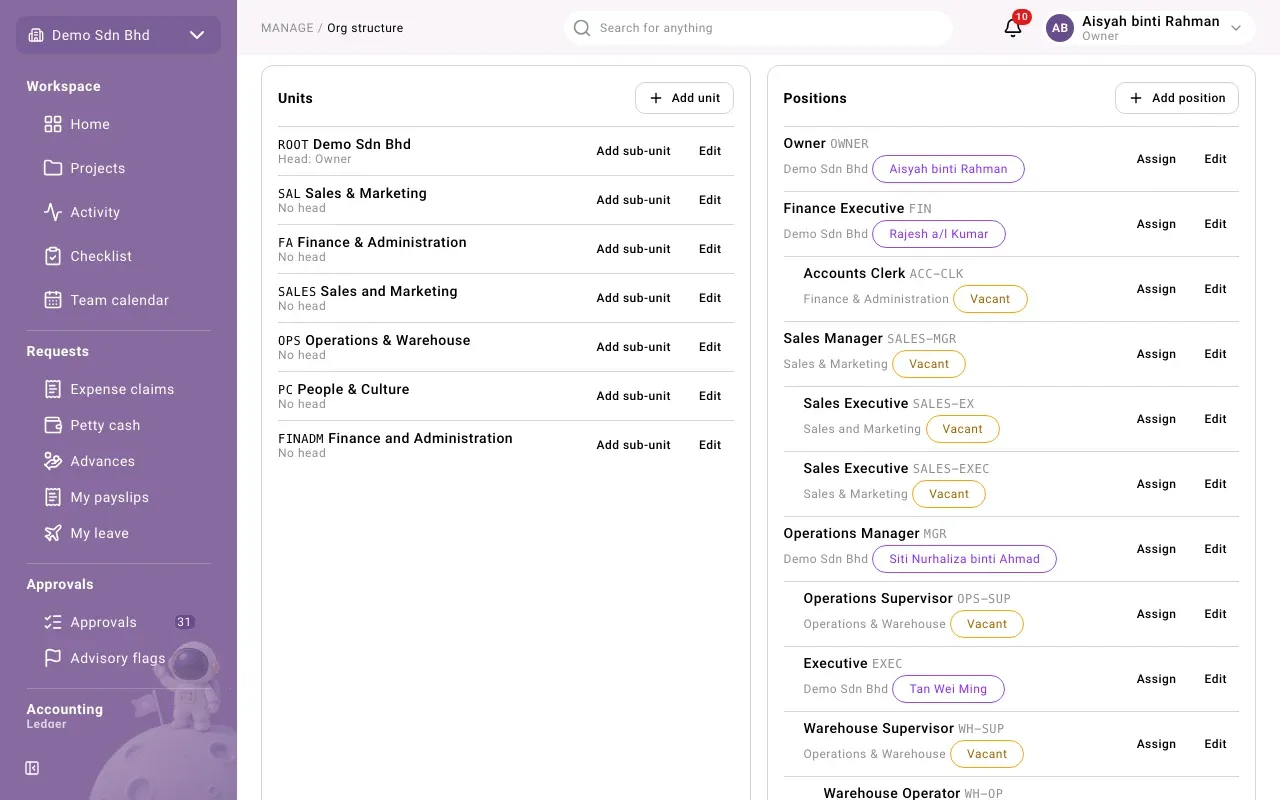
Units shows the units as a tree, each with its code, name and “Head:” position (or No head). Retired units are greyed and tagged Retired.
Add a unit
Section titled “Add a unit”-
Select Add unit (or Add sub-unit on the unit it belongs under).
-
Fill in:
Field What to enter Code A short code for the unit. “A unit’s code cannot be changed” later. Name The unit’s name, in English or Malay Parent unit The unit it sits under, or None (top level) Head position The position that heads it, or No head -
Select Save. You see “Saved”.
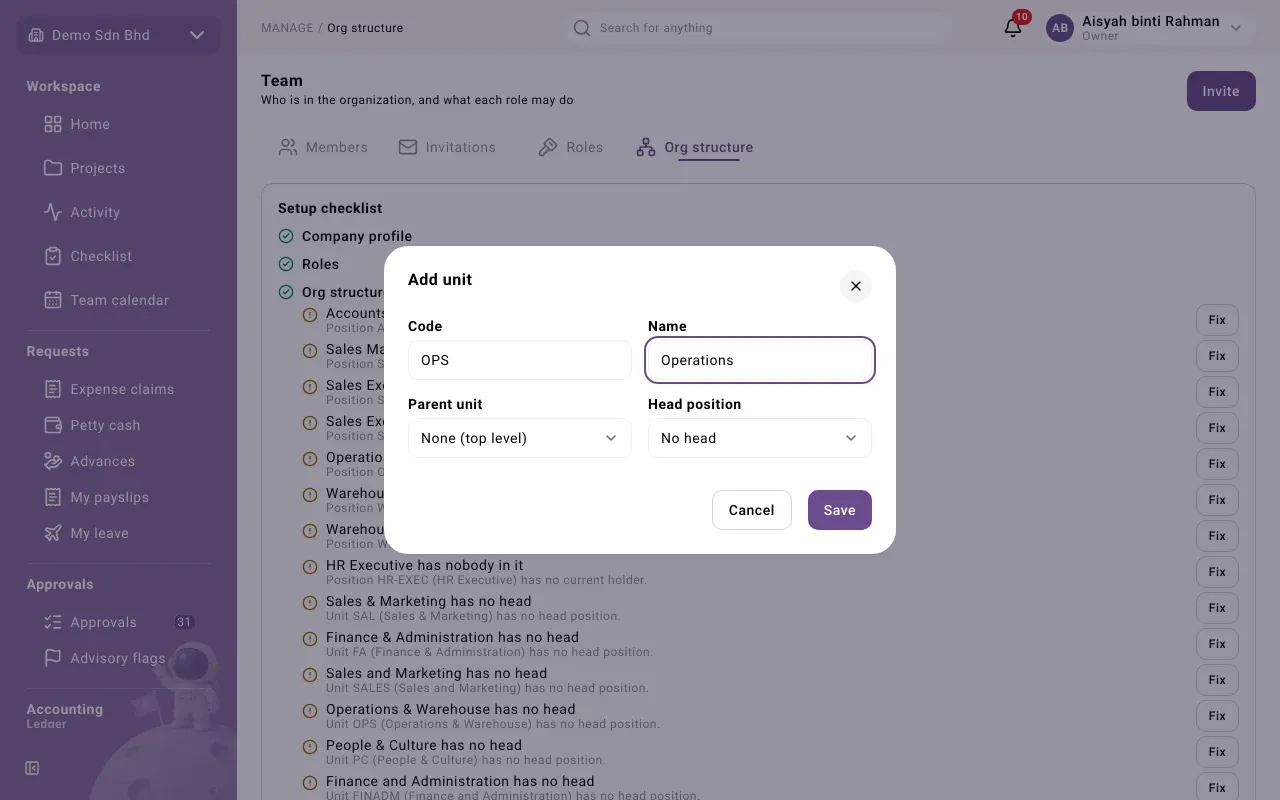
To change a unit, select Edit on its row. You can change its name, parent and head, but not its code.
Positions
Section titled “Positions”Positions shows the positions as a tree following who reports to whom. Each row shows the title and code, the unit, and who holds it, or Vacant.
Add a position
Section titled “Add a position”-
Select Add position.
-
Fill in:
Field What to enter Unit The unit it belongs to Code A short code for the position Title The job title, for example “Finance Manager” Reports to The position above it, or Nobody (top of the tree) -
Select Save.
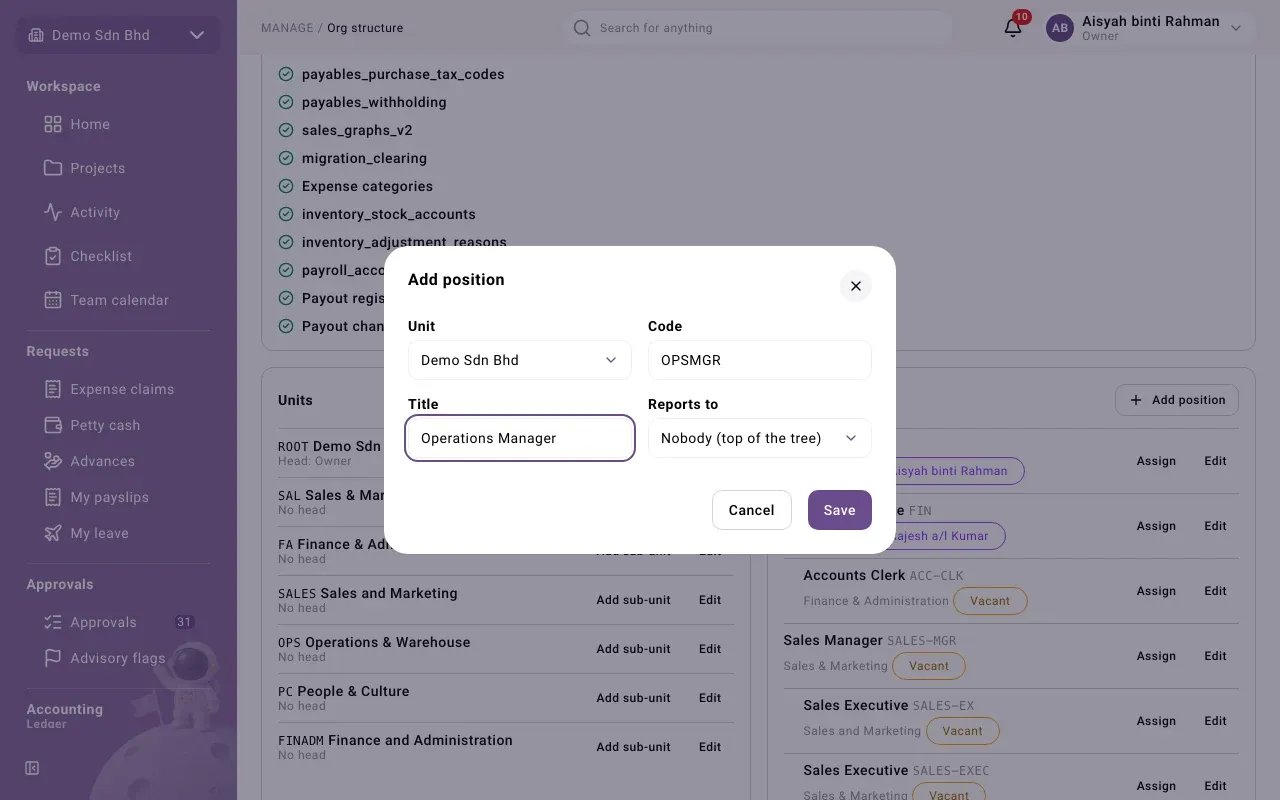
Once saved, only Reports to can be changed: select Edit on the row. “A position’s title cannot be changed”, and neither can its unit or code. If a title is wrong, create a new position and retire the old one.
Put someone in a position
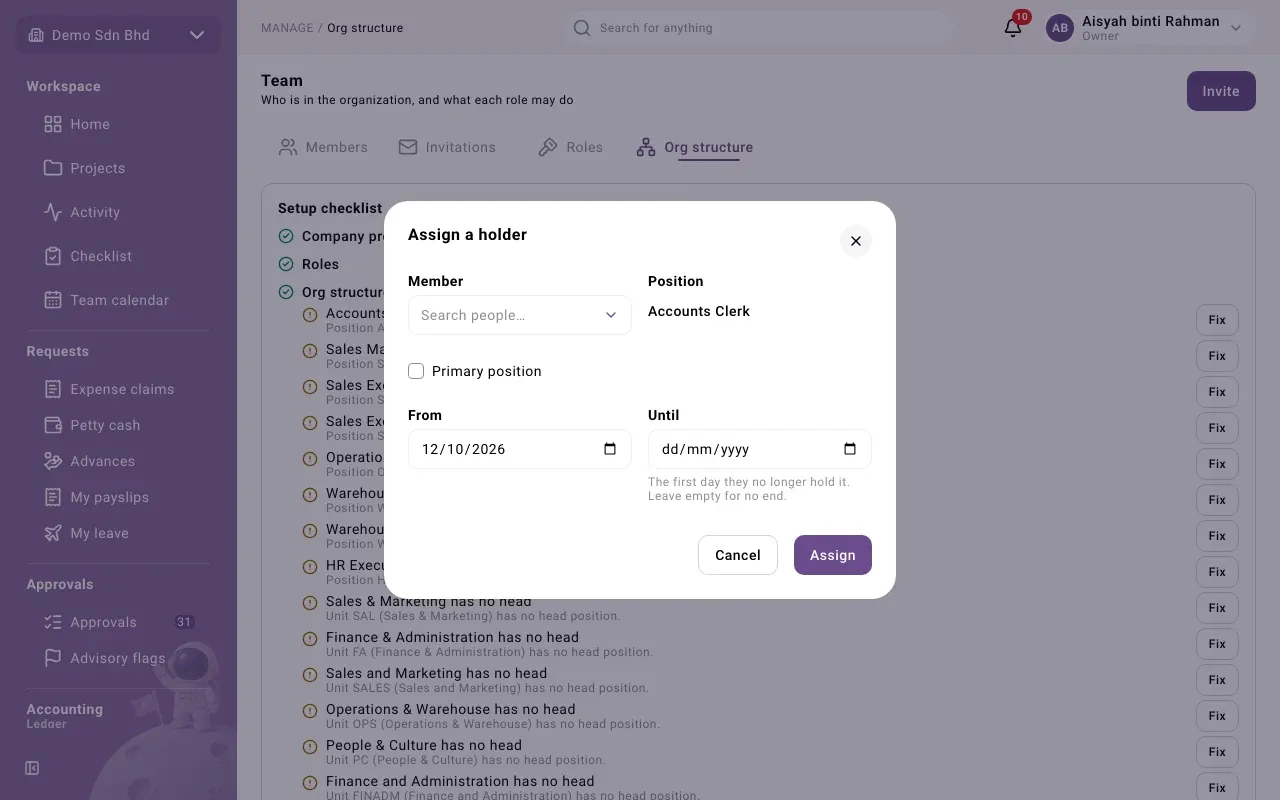
Section titled “Put someone in a position”- Select Assign on the position’s row (or Fix on a checklist warning).
- Choose the Member (search by name) and the Position, if not already filled in.
- Tick Primary position if this is the person’s main job. Their claims are routed from their primary position.
- Set From, normally today, and optionally Until: “The first day they no longer hold it. Leave empty for no end.”
- Select Assign. You see “Assigned”.
Retire a unit or position
Section titled “Retire a unit or position”Open it with Edit and select Retire unit or Retire position. It stays in the tree, greyed and tagged Retired, but can no longer be edited or assigned.
Problems
Section titled “Problems”| Message | What to do |
|---|---|
| Enter a code and a name | Both are needed for a unit. |
| Choose a unit and enter a code and a title | All three are needed for a position. |
| Choose a member and a position | Pick both before you select Assign. |